Regardless of whether your back-to-school setup consists of homeschooling around the dining room table, around the house, or around the world, you can still create an amazing back-to-school space! Here are some ideas to get you started.
For homeschool mom Charleen McNally, space became an issue when her college daughter returned home and needed the schoolroom for her bedroom. She needed to take a small space (9’x9’) and a small budget and create a functional homeschool room. In her own words, here’s how she did it.
Determine Your Needs
I currently have four children being homeschooled. My two high-schoolers do classwork in their own rooms using Abeka DVDs. Since my fourth- and seventh-grade children are taught traditionally, I need them close by.
Store Only the Essentials
Since I no longer had the wall space for a bookcase, unnecessary books and materials were removed. The essentials are stored in baskets and can be tucked away at the end of the day. Our answer keys have separate storage in Ikea magazine files.
Brainstorm about Desks
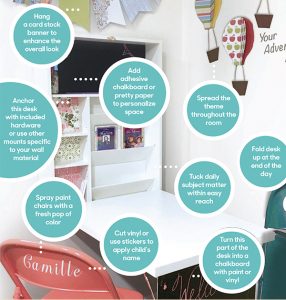
We needed small desks that could be tucked away at the end of the day. I found convertible desks to buy on Amazon and Murphy desks to build on Pinterest. My contractor (aka husband) decided that buying the desks would be the least-expensive option. Big on functionality, these desks are a dream come true! My favorite part is the desk front. When covered in chalkboard contact paper, it’s perfect for writing daily assignments and board work. The desks are folded back up after each school day.
Get Creative with Seating
My children love their chairs! Staying with the tucked-away theme, I spray-painted old folding chairs. The chairs were then customized with my children’s names, using my Cricut and white vinyl. Their names can easily be removed.
Decorate with a Theme
“Your Adventure Awaits” is our homeschool theme for the year. I used school-themed scrapbook paper and a balloon idea from Pinterest. I made banners using my Cricut and hung them with twine. I also personalized each of their cubbies, making their desks a fun place to learn.
Charleen McNally and her husband have 7 children. The family lives in East Windsor, Connecticut, where they have been homeschooling for 18 years.
More Ideas from Homeschool Moms Like You
Raining Books
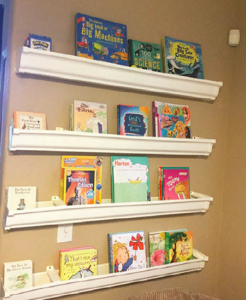
Dawna Hite transformed plastic rain gutters into inviting, outward-facing bookshelves for about $5 per 10 feet. She had them cut to size before she left the store. Installation was fast and easy and done in less than an hour! Dawna Hite, WA
Divide and Conquer
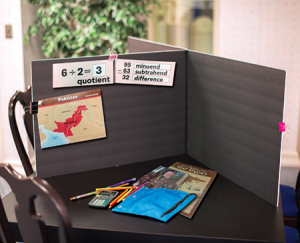
With $4 and 15 minutes, Kathiann Weatherbee crafted an awesome tabletop divider for her kids! All it takes is three craft boards and same-color electrical tape from the dollar store. Tape boards together on two sides. One side left untaped means this divider can be folded up and put away. Kathiann Weatherbee, FL
Decorate Around a Piece You Love
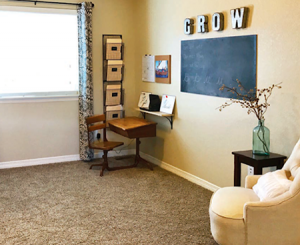
You don’t have to completely revamp your decorating or entirely surrender a room to create a great homeschool space. Darianne Whitt designed her schoolroom around an antique desk that she loves. The result: a beautiful and functional school space that blends perfectly with her home office. Darianne Whitt, CO
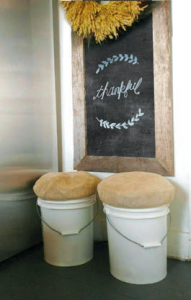
Bucket Seats
Joy Alexander upscales feed buckets from their dairy farm into clever seating. (Buckets can also be purchased from home improvement stores for under $5.) Cut plywood to fit bucket mouth; staple decorative fabric over foam seat top. For a sturdier version, Joy buys a GAMMA SealTM lid and tops with ready-made stool cover. Joy Alexander, VA
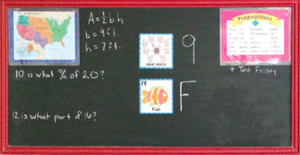
Chalkboard by Day; Decoration by Night
Because Jackie Smith’s schoolroom and dining room are one and the same, Jackie wanted a chalkboard that could double as a dining room decoration. She made her own with cut-to-order plywood, trim, and chalkboard paint. Jackie Smith, WA

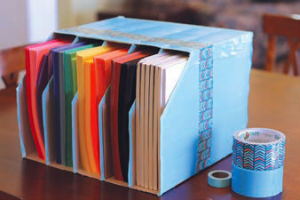
Cereal Organization
Rebekah Hodge organizes a mountain of construction paper without spending any money. All it takes is five cereal boxes, a box cutter, hot glue, and duct tape. Since cereal boxes are pretty flimsy, duct tape is needed to make them stable enough to stand alone. Rebekah Hodge, MD
Panful of Smart Ideas
Jessica Thomas found an inexpensive way to make a large magnetic board, using an oil drip pan! She hangs hers at kid-level, using heavy-duty Velcro 3M strips. Jessica Thomas, WA

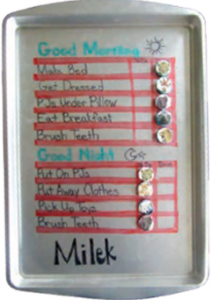
Klarysha Goncharenko created her own magnetic, interactive To-Do board, using permanent markers, round magnets, and a $1 cookie sheet. Either pan becomes a magnetized chalkboard with a coat of chalkboard paint! Klarysha Goncharenko, TX
Hanging Chart/Easel
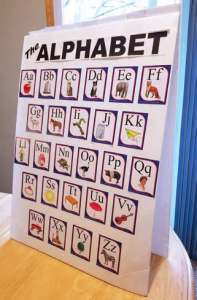
Kathleen Giralt came up with these hanging chart/easels. Each of her children has his own set with 4 usable sides. To make: tape two foam boards together at the top, leaving a small gap between the boards. Hang over cabinet doors, on a thin bar, or stand up like an easel. This is perfect for our Mini Alphabet Flashcards. Kathleen Giralt, MT
Garage-Sized Homeschool Space
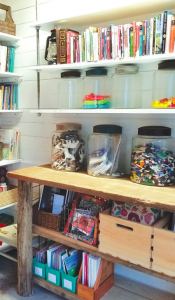
Need a really big homeschool space? The Paul family moved their vehicles and turned the garage into a huge schoolroom. Amy has enough room for wide book shelves filled with creative organization such as wire baskets and glass jars. Amy Paul, FL
Masterpiece Wall
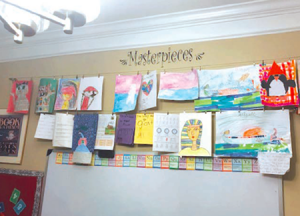
Kendra Russell displays her children’s artwork on an Ikea adjustable tension wire, which costs about $5 and can be set to a desired length. Kendra Russell, NC
Picture-Perfect
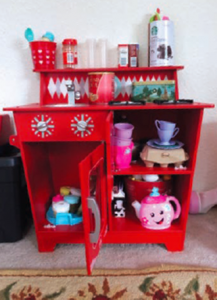
Jackie Smith maintains an organized school space by snapping a picture of the room when it’s perfectly organized. She has her kids use the image to help them know where to put things back. Jackie Smith, WA
Secret Command Center
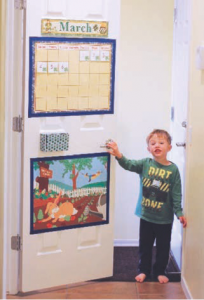
At the Wiggett homeschool, we have a secret command center, using the inside of a closet door. We use ours the same way you’d use a bulletin board. When we shut the door, it creates a hassle-free hiding place! Katie Wiggett, AZ
We want to see your homeschool room! Post a picture on social media, use the hashtag #AbekaHomeschool, and tag our Instagram or Facebook account.



Comments for Small Homeschool Classroom On A Budget
Add A Comment
Your email address will not be published. Required fields are marked *